
This is not tiny house related, but rather about frugality and self sufficiency.
I am gluten sensitive, but I found that I could eat naturally fermented sourdough bread, because fermenting breaks down the gluten. Trouble was, I found it hard to find good bread like this and then when I did, I found that the price of $6-10 a loaf sort of insane! So I though I would again start making my own bread but this time natural sourdough.
So I started looking up how to make it, and everywhere I looked the recipes were so complicated and used terms I did not understand. It took me about a week of browsing intimidating and wasteful recipes. But I had to ask myself why the craziness? This can’t be that hard! I mean, for hundreds and hundreds of years we (primarily women) baked our own sourdough breads in our homes… and this was in the days before we had ovens that just switched on.
So I broke through my intimidation, and you know what? It is not hard!!! It costs me just a little bit of time, like 30 seconds a day and a half hour on baking days. Plus it is cheap to make it, about $1.50 or $2.00 for a massive loaf that lasts the two of us for three days. I know, right???
PLEASE NOTE… One super important factoid first: if your starter stinks throw it out and start again. Stink means BAD bacteria got in there and you cannot eat it ask yourself how it might have gotten contaminated… was your jar, your cover and the stirring utensils clean? Or was this just bad luck?
Tools needed:
Two jars and a two pieces of cotton or other clean breathable fabric to cover them
Very large ceramic or glass bowl and a tea towel big enough to cover this
Large lidded Dutch oven OR two small ones
A very stiff silicon spatula (the kind with the wood or metal inside)
An oven
Supplies needed Organic flour (preferably bread flour), water (and salt on baking day)
This is a stupidly long recipe and it takes days… BUT HONESTLY, IT IS SUPER EASY… and once you have a starter you can stir together a loaf of fresh bread every three days. I have mine on a morning schedule because this works for me, if this does not work for you find a time that works for you. If you can commit to 30 seconds a day, twice a day for a week, then the rest is simply stirring up thick dough in a big bowl and turing on the oven.
Summary of Making a Sourdough Starter and Sponge
Make your starter (this should be kept in a room in a place where the temperature is 71 degrees. If colder the starter will take longer, and it warmer the starter will take less time. Try different areas of your house for a spot that is closest to this temperature
USE ORGANIC FLOUR (better for natural yeast fermentation)! BREAD FLOUR IS BEST, but not 100% required.

STARTER
Day 1
In a large sterile jar. Mix 1 cup water and 1 cup flour. Cover with cheesecloth.
Day 2
Add 2 Tablespoons flour and 2 Tablespoons water stirring twice daily. Cover with cheesecloth.
Day 3
Same as day two.
Day 4 *** smell this to be sure it smells floury and slightly sour, if putrid dispose of it! pour this mixture over to a different sterilized jar then…
Same as day two.
Day 5
Same as day two.
Day 6
Same as day two.
Day 7
Same as day two.
On the 8th day –
Add 2 Tablespoons flour and 2 Tablespoons water wait about to minutes and see if this gets very active and bubbly… if it is NOT very active, then stirring twice daily. Cover with cheesecloth and try again the next day. (is it warm enough)
This starter can be kept alive in this way for hundreds of years.
You can refrigerate to slow it down, if you don’t need bread, or are away ( you can look up more about this and how to deal with a starter)
HINT: IF YOU CAN’T TELL… take a spoon of this out and put it into a glass of water, if it floats it is active.
If it is active, pour all but one cup of this mixture over to a different sterilized jar then:
____________
BREAD! Sorry you don’t get to eat it today, or tomorrow either… I know, right???
Pour a cup of this mixture into a large bowl, add two cups of flour and two cups of water to it, mix this together.
For the next two days you are feeding this a cup of flour in the morning and stirring twice daily. Cover with cheese cloth.
DAY 11*** – Add not quite a tablespoon of salt to the mixture and stir this in. Then add flour and fold this into your dough. Keep adding flour and folding until your dough gets thick enough so that you can pull it with your hands and they don’t stick to it and the dough holds a shape. Then remove this dough from the bowl, place this on the counter, and scrape all the left over stuff away from the bowl.
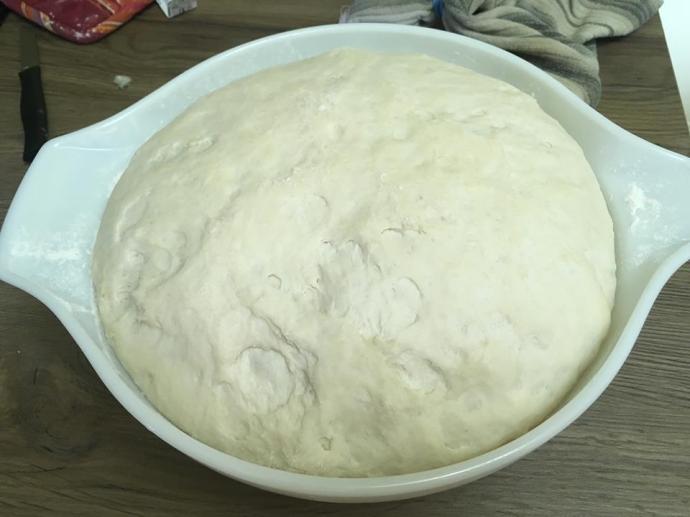
Put the dough back into the bowl and cover with a clean cheesecloth. Let this rise until doubled.
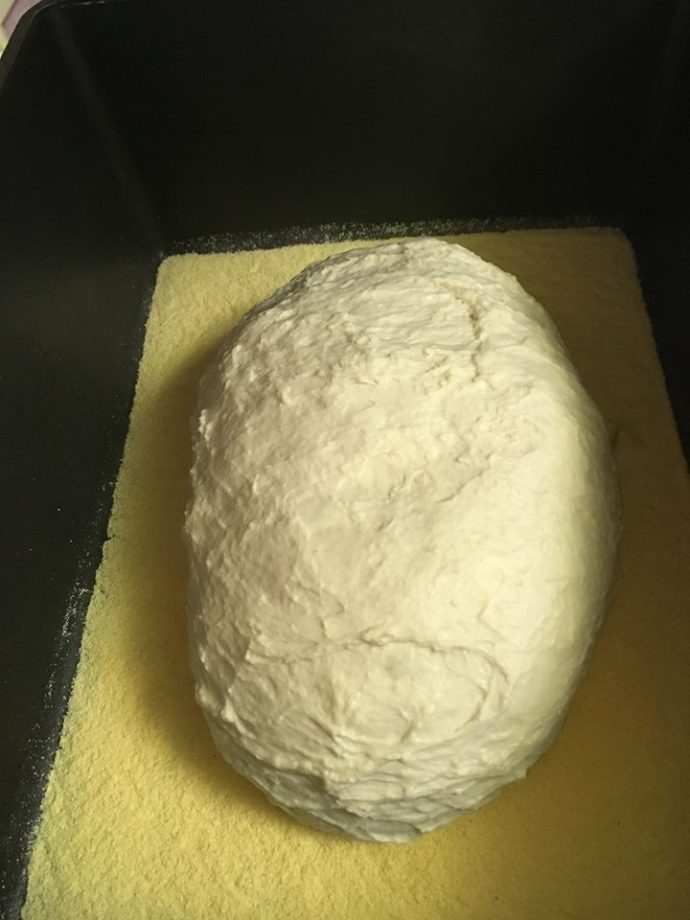
Once doubled, take out your dutch oven and put a good layer of cornmeal on the base. Now start folding your dough and shape it. place in the middle of your dutch oven, close the lid and wait until this has raised up about half its size. Then preheat your oven to 200 C or 400 F and decide if you want to score the top with a very sharp knife or not. Your choice (scored breads maintain a more consistent shape) when you don’t score, you don’t know where they will break.
When this is ready put your dutch oven in on the middle or low middle rack (keeping it covered) and bake. After half an hour remove the lid and continue to bake (about 15-25 minutes) until the bread is the darkness that you desire.
Remove from oven and put on a cooling rack (if you don’t have one remove one from your stove before you bake and set this on a cookie sheet or something that will allow heat to escape)
Now here is the HARD part… you have to wait until this cools before you cut it and eat it… Your house will have smelled mildly like bread from about day six… so it is NOT easy!
***
NOTE: Day 11 if you want to add other things to your bread this is the time… Rosemary and olive, different flours, herbs and so on… Now that you have a starter, you can bake a fresh loaf every three days and by the second loaf you will be an expert at changing your jars and mixing up the new loaf.
This takes just 30 seconds, twice a day on days you don’t bake.
On baking day it is 15 minutes of work in the morning, and another couple of minutes to form the loaf later on, then placing in the oven, removing the lid and removing from the oven. Unless I need the dutch oven I just leave the corn meal in there, cover it and add more and use it again the next time. Cleaning the bowl and spatula take another couple of minutes. It is at most a half hour out of your day.
____________
NOTE:
THIS is where I got the original starter recipe from … I modified this to change the jars (you will see why) and also adding the bread recipe, because I found it confusing to come to the end of this and be asked to put commercial yeast in – you do not need it if your starter floats!
This blogger though has more information about the details of starters and when I looked on line for recipes, I found that most sites add a lot of flour and water and then throw it out (wasteful right???) and I liked the frugality and practicality of her thinking on this.
